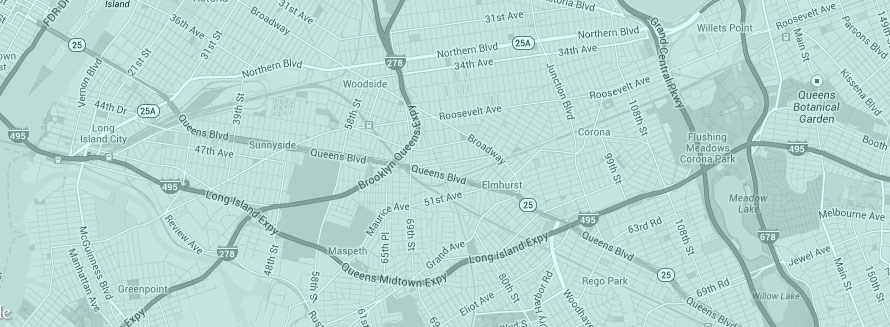
A Google Map is a great feature to include on a “Contact” or “About” page. It adds a layer of interactivity and allows your visitors to quickly see where you or your business is located. However, if you really want your design to standout, simply embedding a standard Google Map won’t cut it.
So in this short tutorial, I’m going to show you how to easily make a Google Map in WordPress look more integrated with your branding and website. We used this technique in our Hayden WordPress theme and you can easily see there is a world of difference between this approach and a standard map.
Google Map API
We’re going to create a php file that you can include in your WordPress page template where you want the map to appear. Name the file something like google-map.php and add it to the root of your theme. Here is the full code that you need to add to the file. I’ll discuss the important lines of code below.
<div id="googleMap"></div>

<script type="text/javascript" src="http://maps.google.com/maps/api/js?sensor=false"></script>
<script type="text/javascript">
//<![CDATA[
var geocoder = new google.maps.Geocoder();
var address = ""; //Add your address here, all on one line.
var latitude;
var longitude;
var color = ""; //Set your tint color. Needs to be a hex value.

function getGeocode() {
	geocoder.geocode( { 'address': address}, function(results, status) {
		if (status == google.maps.GeocoderStatus.OK) {
    		latitude = results[0].geometry.location.lat();
			longitude = results[0].geometry.location.lng();
			initGoogleMap();
    	}
	});
}

function initGoogleMap() {
	var styles = [
	    {
	      stylers: [
	        { saturation: -100 }
	      ]
	    }
	];

	var options = {
		mapTypeControlOptions: {
			mapTypeIds: ['Styled']
		},
		center: new google.maps.LatLng(latitude, longitude),
		zoom: 13,
		scrollwheel: false,
		navigationControl: false,
		mapTypeControl: false,
		zoomControl: true,
		disableDefaultUI: true,
		mapTypeId: 'Styled'
	};
	var div = document.getElementById('googleMap');
	var map = new google.maps.Map(div, options);
	marker = new google.maps.Marker({
	    map:map,
	    draggable:false,
	    animation: google.maps.Animation.DROP,
	    position: new google.maps.LatLng(latitude,longitude)
	});
	var styledMapType = new google.maps.StyledMapType(styles, { name: 'Styled' });
	map.mapTypes.set('Styled', styledMapType);

	var infowindow = new google.maps.InfoWindow({
	      content: "<div class='iwContent'>"+address+"</div>"
	});
	google.maps.event.addListener(marker, 'click', function() {
	    infowindow.open(map,marker);
	  });


	bounds = new google.maps.LatLngBounds(
	  new google.maps.LatLng(-84.999999, -179.999999),
	  new google.maps.LatLng(84.999999, 179.999999));

	rect = new google.maps.Rectangle({
	    bounds: bounds,
	    fillColor: color,
	    fillOpacity: 0.2,
	    strokeWeight: 0,
	    map: map
	});
}
google.maps.event.addDomListener(window, 'load', getGeocode);
//]]>
</script>
The first line is where we add the div in which the Google Map will be loaded. On line 3, we load the Google Map API. Without it, nothing else in the file will work. On line 7, add the address of the location you want to appear on the map. The getGeoCode function on line 12 will convert the address to latitude and longitude values. It’s important that the address is all on one line. Line 10 is where you set the color tint of your map. You need to use a hex value. For example: #64cdce.
A couple of other values that you might want to tweak are zoom on line 36, and fillOpacity on line 70.
Adding the Map to your Page Template
Depending on where you want your map to appear, you’ll need to add the following code to the appropriate page template. Most of the time, you see these kinds of maps right after the header of right before the footer. This line of code simply loads the file we created above.
<?php get_template_part( 'google-map'); ?>Making the Map Full Width
Add this CSS to your theme’s style.css file. It will set a height for your map and make it stretch full width of it’s containing div.
#googleMap iframe {
   width: 100%;
}
#googleMap {
   height: 350px;
}
#googleMap img { max-width: none; }


As luck would have it I’ve been searching for a full width Google map solution for the re-design of my own site and this works perfectly. The colour tinting is a nice bonus too.
Thanks!
Tinting can be easily done by map stylers, no need to draw colored rectangle.
See here: http://snazzymaps.com/style/7/icy-blue
Thanks for the tip!
Great tutorial. Thanks
This isn’t working for me. I’ve done as per the tutorial and added an address and hexadecimal colour, but just getting nothing appearing.
The scripts are loading into the page, the div is generated, but it’s empty…
Any tips?
Scratch that – it is working! Thanks!
Great! Glad you got it worked out.
I’d been looking for a way to combine some of the Hayden theme features to the Port theme. This definitely takes care of that, thanks!
Anyway to allow a user to get directions right from the map or link to a places page instead of an address?
The layout seems to be broken, body text is overlaying the code so i can’t read it properly
And after like 10 months, they still didn’t bother fixing it~ =(